


Following the resurgence of vinyl, we're quite often asked about how our customers can convert their analogue vinyl recordings into digital files that their modern devices can understand. Whether this be because their new vinyl purchase didn't include a digital download link, or because they have some rarities or special pressings from the past that never made it on to the digital format. We've put together this step-by-step guide on how to convert your vinyl records into digital files. Of course, this process is done in real-time - so the larger your collection, the longer the process will take...
What you'll need:
- A quality turntable (Such as the Project Essential II or Debut Carbon)
- You can get turntables with integrated phono/USB capability, but as with most instances in hifi, you'll often find a better performance is achieved when using a separate phono stage. - Your vinyl records
- A Phono Pre-Amp/ADC (Analogue to Digital Converter) (Such as the Record Box E)
- These products also vary in quality. Your choice of pre-amp/ADC should correlate to the quality of your turntable. If you have an entry level turntable, then something like the Record Box E or Phono Box USB would suffice. If you have a higher-end turntable then you should consider a higher-end phonostage/ADC to get the most out of it. - Computer
- RCA/Phono Cable, USB cable
- Basic 'get-you-started' interconnects are usually supplied with the products (get in touch with us before you purchase if you're not sure), but quality alternatives from the likes of AudioQuest and The Chord Company should definitely be considered when trying to achieve the best performance.
1) Download An Appropriate Audio Editing Software
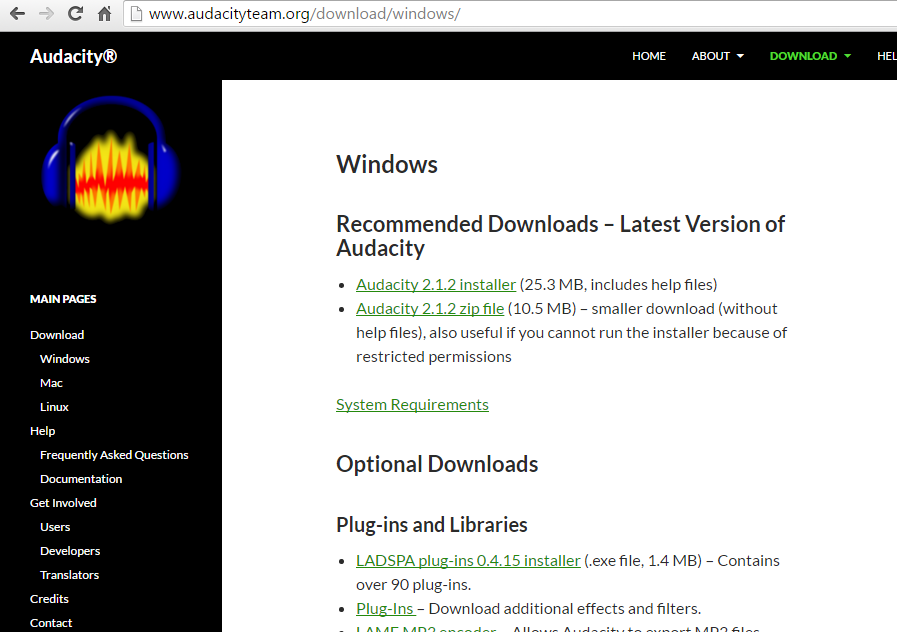
You'll need an audio editing program on your computer in order to capture the waveform of the vinyl and record it in. We would recommend Garageband for Mac and Audacity for Windows. We use Windows here at HifiGear, so the following guide shows screenshots of the process done on Audacity. The steps of the procedure would be pretty similar across most DAWs (Digital Audio Workstations), but Audacity is also available on Mac if you would prefer to follow the guide step by step regardless. Simply follow this link and follow the instructions.
[audio editing programs]
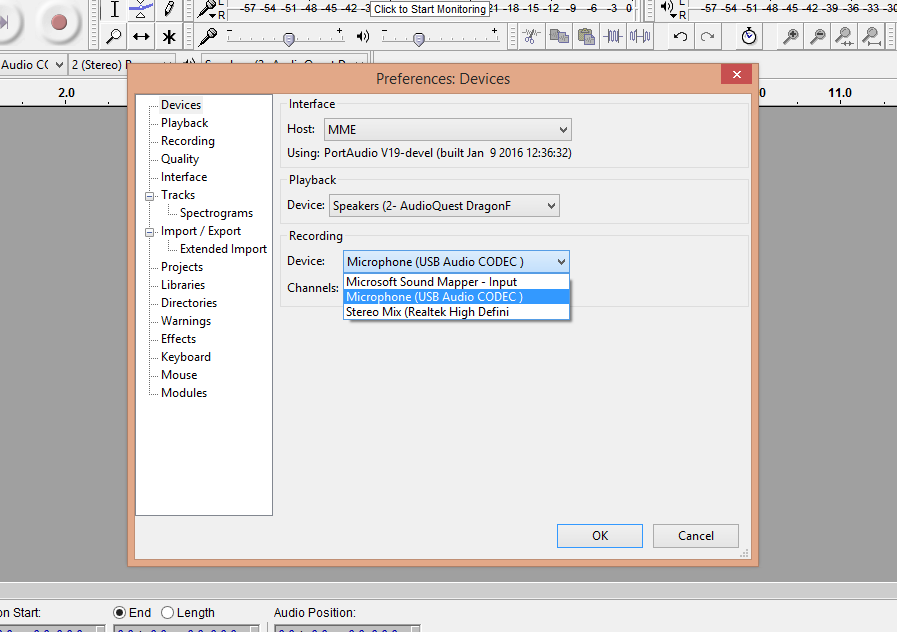
2) Plug In Your Phono Pre-Amp/ADC + Select It Within Audacity

Once you've plugged your phono preamp/ADC into your PC via USB and the drivers have all installed, you may need to tell your PC/Audacity to stop using its built-in sound card and use the Phono Preamp/ADC for incoming signals instead. To do this, open up Audacity and select the 'Edit' menu in the top left hand-corner. From there, select 'Preferences'. Once you've selected 'Preferences', you should land on the 'Devices' section by default. In the 'Recording' option, make sure your Phono Preamp/ADC is selected. In this instance, our Record Box E is named 'Microphone (USB AUDIO CODEC)' - look for your ADC's name here, or reference to 'USB Audio' and ensure it's selected.
3) Start Your Recording
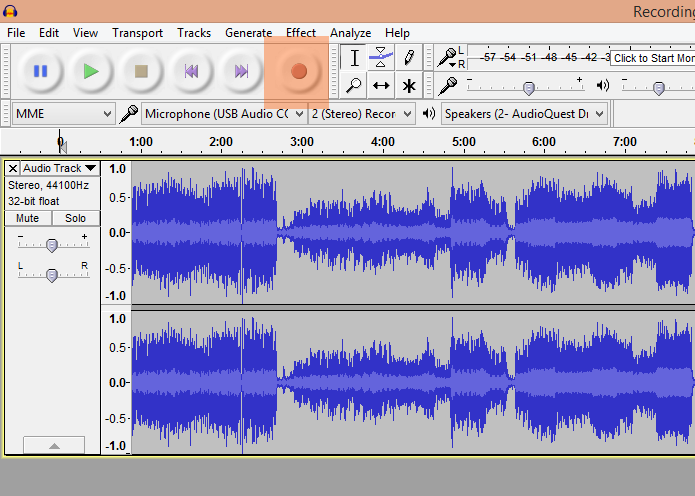
Once you've made sure your computer is aware of the ADC, press 'Record' (highlighted in orange) on Audacity and then begin playing the vinyl record on your turntable. Providing everything is in order, you will see two reflected waveforms filling the screen (top form is LEFT, bottom form is RIGHT) and one if Mono. Now is the time I would recommend you pop the kettle on and make yourself a cup of tea until that side of the record is finished.
4) Highlight Your Tracks and Split Them
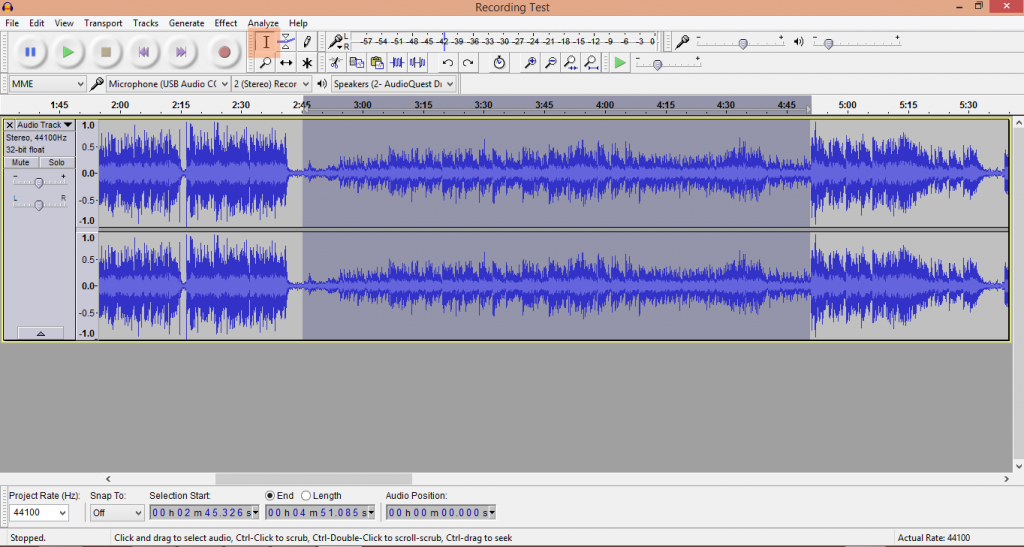
Once the side is done, press 'stop' and your Audacity window should look something like this. This is currently your record in one long track. You can get an idea as to when each song begins and stops by the quieter bits of the waveform. We need to cut these into individual tracks in order to export them as their own files. Use the Select Tool (shown in orange) to highlight the first track, from start to finish - do this by determining where the song starts and from there click-and-drag to where the song finishes.
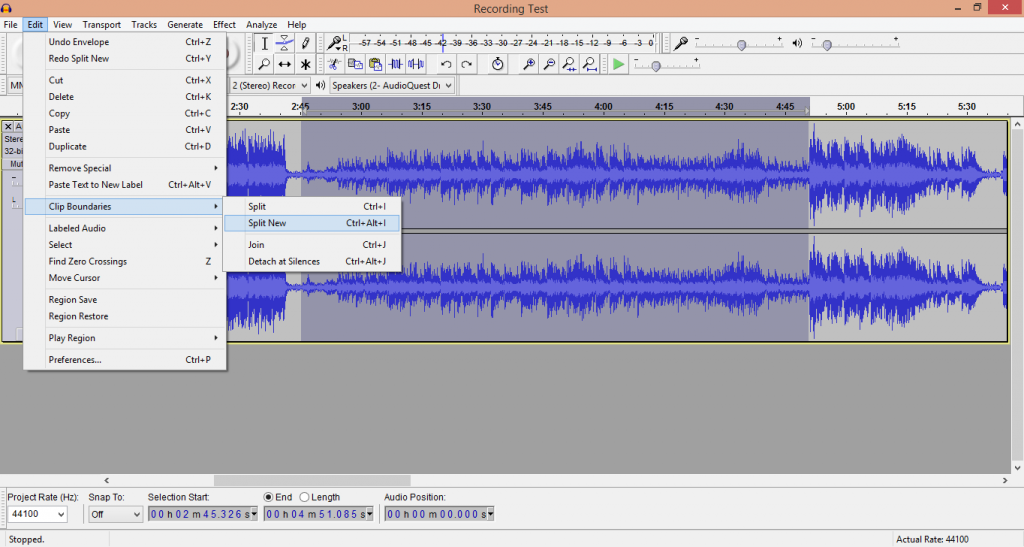
The next step is to take that first track and 'Split' it into a new, individual track of its own. To do this, select 'Edit', 'Clip Boundaries' and 'Split New'. This will automatically put the highlighted part of the waveform (the first song) into it's own, separate track. You will then need to do this to each of the songs, until your Audacity project looks similar to a staircase of waveforms.
5) Export Your Tracks As Individual Files
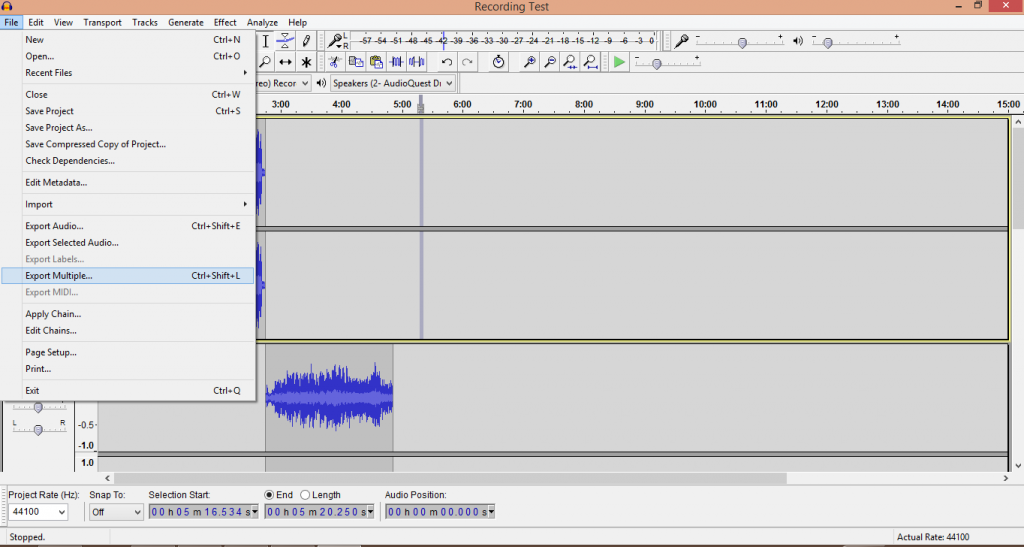
Now that you've separated your waveform into smaller, more accurate waveforms - you need to export them as individual files that you could then play from your computer, put on an iPod, etc. To do this, select 'File' from the top left hand-side corner of the window and click 'Export Multiple'.
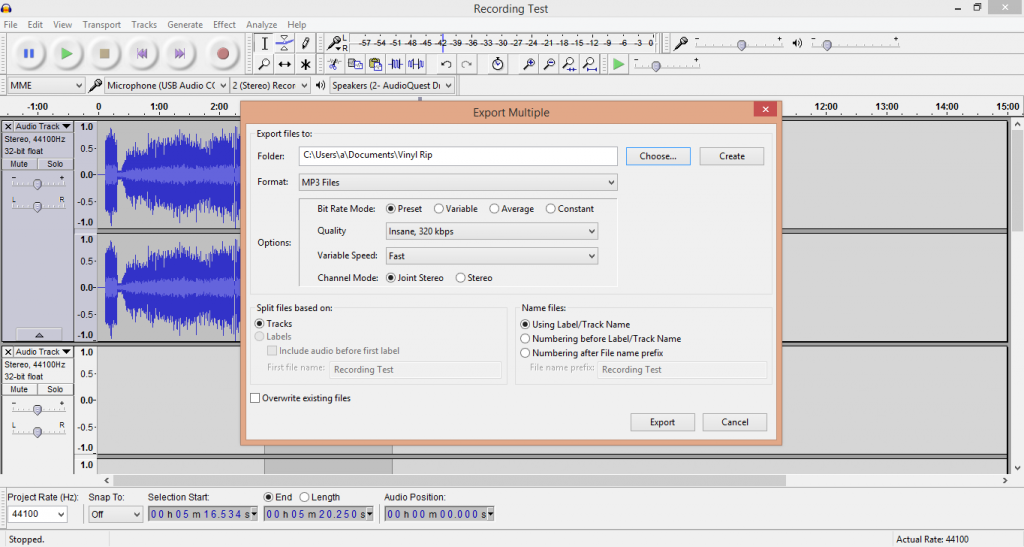
You're then able to select the format you wish to export your recordings in to. For more information on what these formats mean, see our Guide To File & Formats. We're importing this vinyl record for use with an iPod with relatively low storage memory, so we're going to compromise quality for space and export them as a compressed MP3.
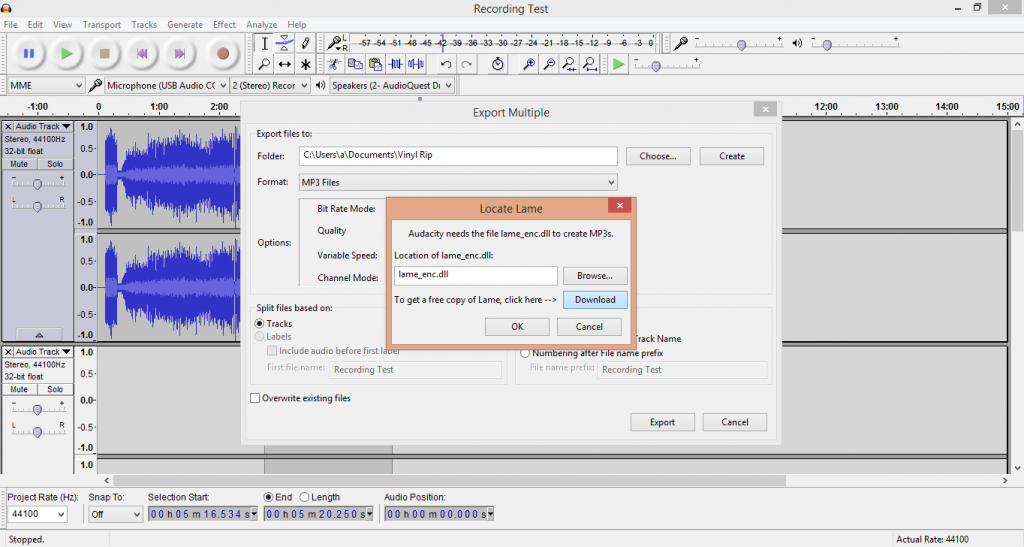
Audacity isn't able to encode files in MP3 as standard, so it may ask you to download the 'LAME MP3 Encoder', if you need to do this then select MP3 and click Download and follow the instructions. (You might need to 'SAVE' your Audacity Project and reopen it)
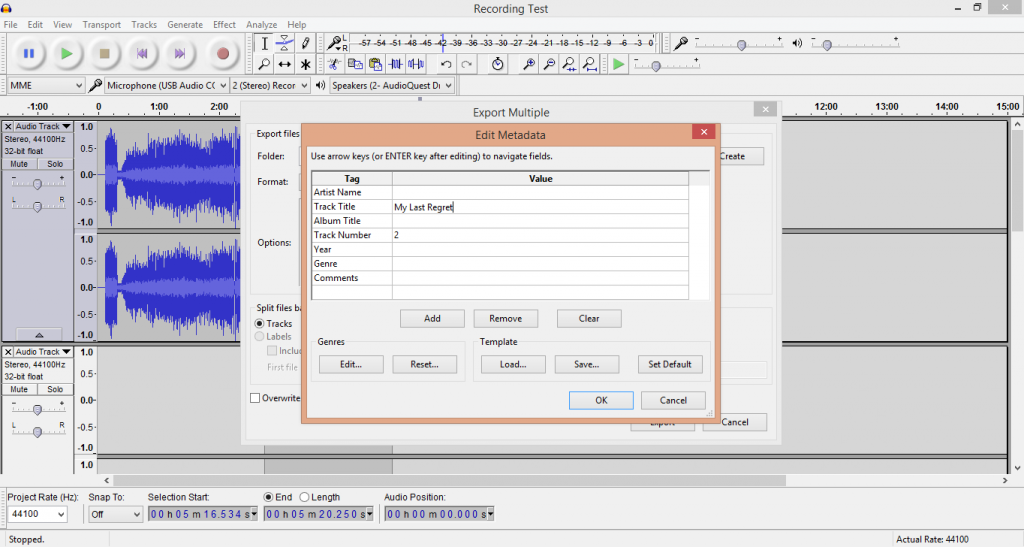
Once you've installed the LAME encoder, choose where on your computer you'd like to save the songs. Selecting MP3 from the Export menu now results in the Metadata pop-up shown here.
The 'Metadata' is the information attributed to the MP3 file that gives it an identity for your devices; such as Artist, Album and Track name. If you leave these blank, you'll get 'Unknown Artist, Unknown Album, Track 1' which would make it difficult to find on your iPod. To save time, only input the Track Name for each one, as we can bulk-add the Artist, Album, Etc information at the end.
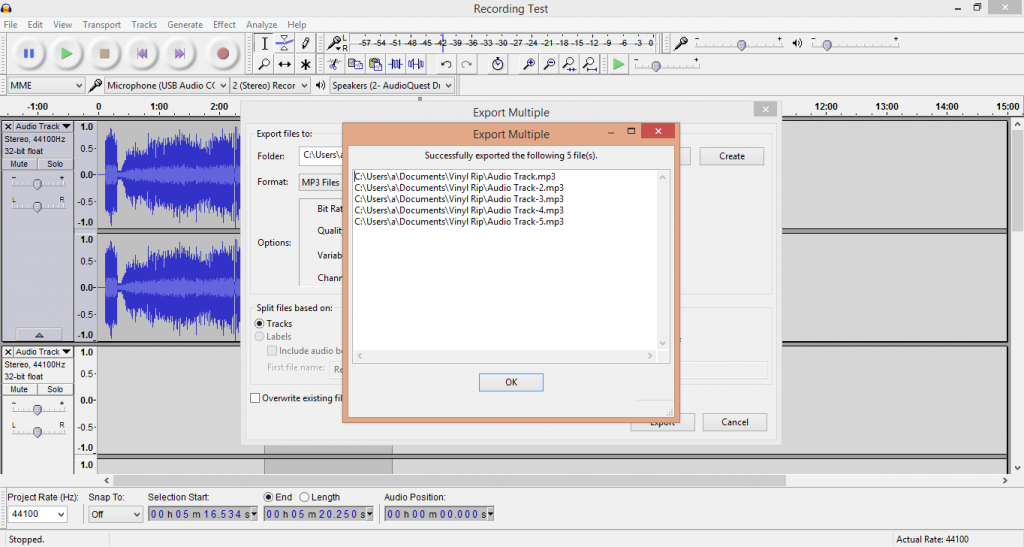
The files will begin to export to the folder you selected. Once the process is complete, you'll be greeted with this pop-up to show you a list of the tracks you've exported. You will then find the MP3 files in your chosen folder.
6) Final Step: Finish Adding the Metadata
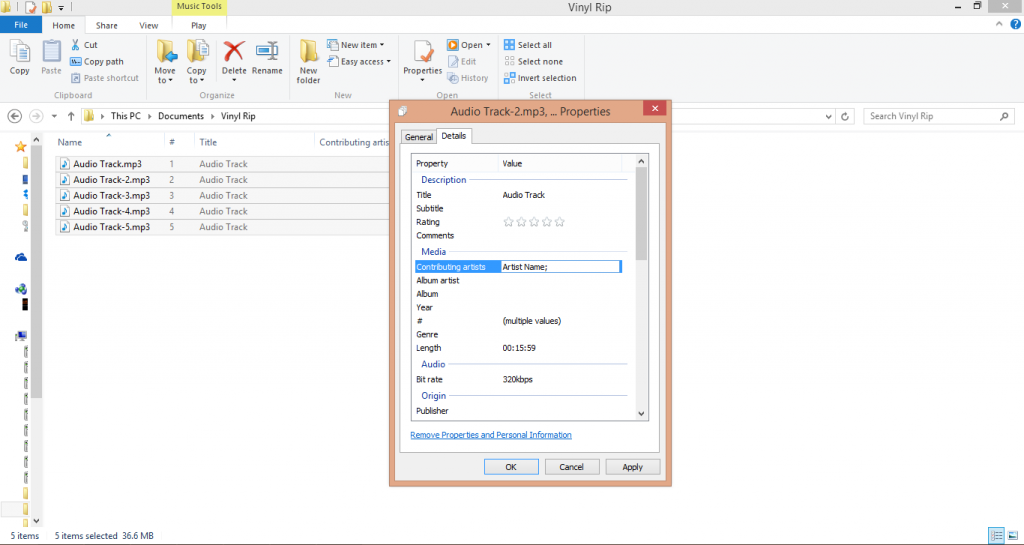
At this point, we want to add the missing metadata as we can now edit files all at once. Simply select all of the files, right click them and choose 'Properties'. Ignore the Track Name field, as we already put these in earlier and changing it will, of course, rename all the tracks to the same thing. If the vinyl record is an album by one singular artist, simple type the artist name into the relevant fields, along with the album name and the year and genre if you wish.
And that's it! You're now left with a selection of files, taken from your vinyl record that you are able to play and import to your devices as though you'd just ripped a CD. You just need to follow this process again for the other side of the LP, then with any additional records you wish to import.